Coding Outreach Group Summer Workshop 2022
GitHub Pages
06/01/2022
Content Creator: Katie Jobson Content Editor: Haroon Popal
Description
This workshop aims to cover the basics of GitHub, and will give a tutorial on how to make a webpage with GitHub Pages.
Prerequisites
- Basic knowledge of bash scripting and Markdown
- A picture of your lab logo (or your animal) in PNG format
Set Up (before the workshop)
- Make a GitHub account (link to do this here)
- For Windows: GitHub Desktop downloaded (link to do this here)
- You will also need to download git for Windows
- For Mac: Git Installer downloads (link to do this here)
- If you have homebrew installed, I highly recommend just typing 'brew install git' into your command line
Workshop Objectives
- Learn some of the basic utilities of GitHub
- Create your own website (like mine) !!
%%HTML
<iframe width="560" height="315" src="https://www.youtube.com/embed/KfEdXthSEYA" title="YouTube video player" frameborder="0" allowfullscreen></iframe>
GitHub Basics
GitHub is a collaborative platform for individuals who code. The nice thing about GitHub is that you can host many different types of code and script here to share with others! It also makes it easy to upload files in a convient place for both your own work and those that colaborate with you.
You can think of GitHub as one big directory hosted online. You are in charge of the directory under the user name you create, while also being able to share directories with labmates or collaborators, and you can contribute to others' directories. Directories (aka repos) can hold data, scripts, and even full programs.
The main thing you need to know about GitHub for this workshop is how to copy projects to your local computer, make a change to the directory, and send that change back to the website. Before you start creating your own project, we are going to have you download one of our pages, upload an image of your own, and then upload it back into our project on GitHub.
Definitions
Some definitions on terms that are used frequently before we get started!
Repository (Repo): a project folder on GitHub. You can think of it as the "main base" for a project, the folder where everything is stored. All of your changes need to be inside of this folder, and this is the folder that you will send back to GitHub when you have made all of the necessary changes. Can also be referred to as the remote once it has been downloaded to your local machine, as remote contains the actual URL from GitHub.
Branch: this refers to the fact that there can be different versions of one project. The default for your main project branch is literally called main. (Please note that the default used to be called master - if you are looking at older documentation and they refer to the master branch, they are just talking about the default branch of your repo). You can make many branches to a project; this can be used to work with experimental changes to your project, creating a new version of your project (or preserving the old one), etc. We will be working in an old branch of my website repository so you all can build your websites from a more basic template.
Fork: This is an action in which you create a copy of a repository. This is helpful in collaborative settings where you want someone to make changes to your project without directly editing things. They can fork your repository, make the changes that they want, and then you have the option of adding those changes from the fork to your repo.
Clone: This is the action of copying a repository to your local machine. This also opens an online connection between your computer and GitHub that allows you to check the differences betweem them.
Origin: This refers to the primary version of your repository. You can have a few different versions of your repo, but you are required to indicate which one is the default. It also refers to the GitHub URL of the repo you are currently working in.
Front Matter: this is the information at the top of a Markdown file that gives information to GitHub about where it should be in relation to other pages, what the title should be, etc.
Download Our Page
Open your Git Bash window (by typing 'Git Bash' into your search bar) and open the COG GitHub.
For this first part, we are going to have you download the entire COG GitHub, upload the image that we asked you guys to bring today (an image of your lab logo or pet will do!), and you will send those changes to be accepted by us.
To download the repo, there are a few steps:
- Open the GitHub page and click 'Fork' in the top right of the page

- Add the fork to your GitHub
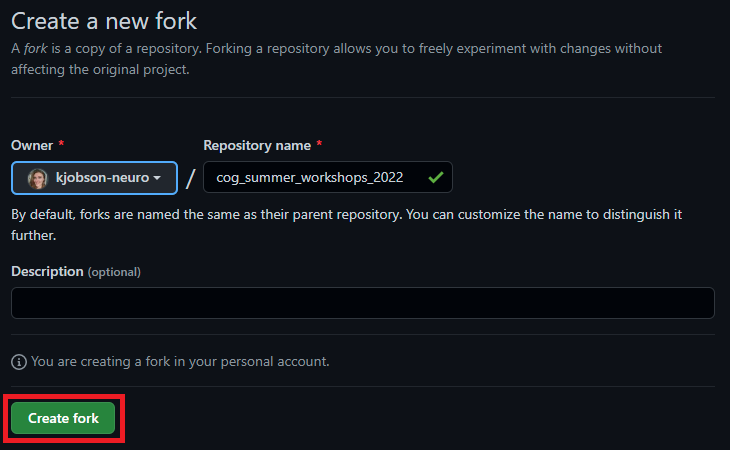
Now, you can type the command below into your terminal (either Git Bash or Terminal). Keep in mind that where ever you are in your home directory, the repo will be downloaded there. So make sure you navigate to somewhere appropriate on your computer. For instance, I downloaded everything into a directory I named 'cog_workshop_github_2022'.
git clone https://github.com/[your GitHub username]/cog_summer_workshops_2022.git
Now navigate into this directory to see the contents of our GitHub on your desktop:
cd cog_summer_workshops_2022

Note that the name of the branch you are in is in parantheses after the working directory.
Now you have this copy of our repo on your desktop. Good GitHub ettiquete in editing other people's repo includes creating your own branch and editing that to make it easier to merge all of your changes. You also need to connect your new fork to the original repo. To do this, you can execute these commands:
git remote add --track main upstream git@github.com:TU-Coding-Outreach-Group/cog_summer-workshop_2022.git
git fetch upstream
Now we need to add a branch to work in:
git checkout branch add_image upstream/main
This creates a branch called add_image, yokes it to the main remote repo, and puts you inside of the new branch. Make sure when you are inside of the repo, it shows (add_image) after the working directory in your command line.
Participation Time!
Add Your Image!
Now that you have a place that you can make changes, you want to add your image into the folder: cog_summer_workshop_2022/github/images/participants
Please remmeber that this should be a PNG file. I will change the names later, but don't make them generic as that may conflict if someone else has the same name. You can copy the image over either by command line or even your Finder/File Explorer.
How to Make Changes to a Folder
Okay, now you have our repo on your desktop, we are going to do a quick tutorial on how to get things from your desktop on to our page.
You were asked to bring an image of your lab logo, or just a picture of your animal(s). I want you all to copy that image into the folder _cog_summer_workshops2022/github/images/participants
The first command you will use is just to check what changes you have made. Remember, there is an online connection between the repo as it is online and what you have on your local desktop. So it can detect changes and discrepancies between what you have and what is online.
git status
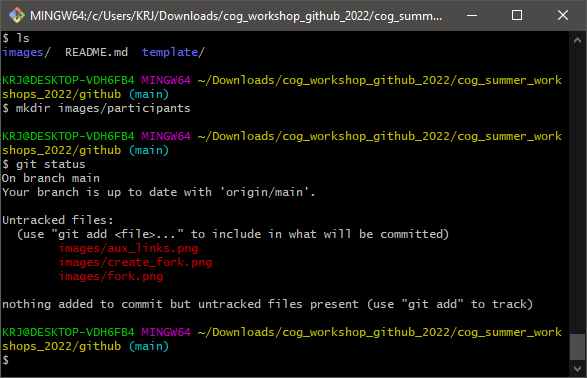
This is an image of my own repo with changes I made, so your message will look a little different. But it should highlight in red what changes you have made that differ from the original repo. GitHub has a function where the changes can be made but not immediately committed to the original repo, likely to prevent mistakes and to make sure what you are sending is correct.
The first step to adding your changes will be to tell GitHub you want to add them:
git add .
If you want to add every change you made, this period will do that for you. But you can add your changes one folder at a time if you prefer.
Then, you need to commit the changes you have added. You have the option of giving a message along with this commit, to let yourself and others know why you made this change:
git commit -a -m "add image to participant folder"
Now, send us the request to add your change to the COG GitHub:
git push -u origin add_image
GitHub Pages and Website Templates
GitHub now has a wonderful function called GitHub Pages which allows you to use your GitHub as a website. You create a separate repository for your page, and can choose from one of their easy-to-use templates. GitHub pages is hosting using Jeykll, which is a static site generator run through a coding language called Ruby. The themes are generally made by groups for free, so some can be very simplistic, and others are complex and can be custmized quite well.
Today, we are going to be walking you through the steps on how to create your own page. I will show you some themes, but I am going to be providing you with an easy-to-work-with template that you can edit and customize today during the workshop!
Create Your Own Repo
The first thing that we need to do is create a new GitHub pages repository for you. This will be the location of your new website! Unfortunately, you will need to use your GitHub username as the name of the repository - if you make it anything else, GitHub will not be happy. Go to your GitHub (any page of your GitHub should work) and click the plus button in the top right-hand corner.
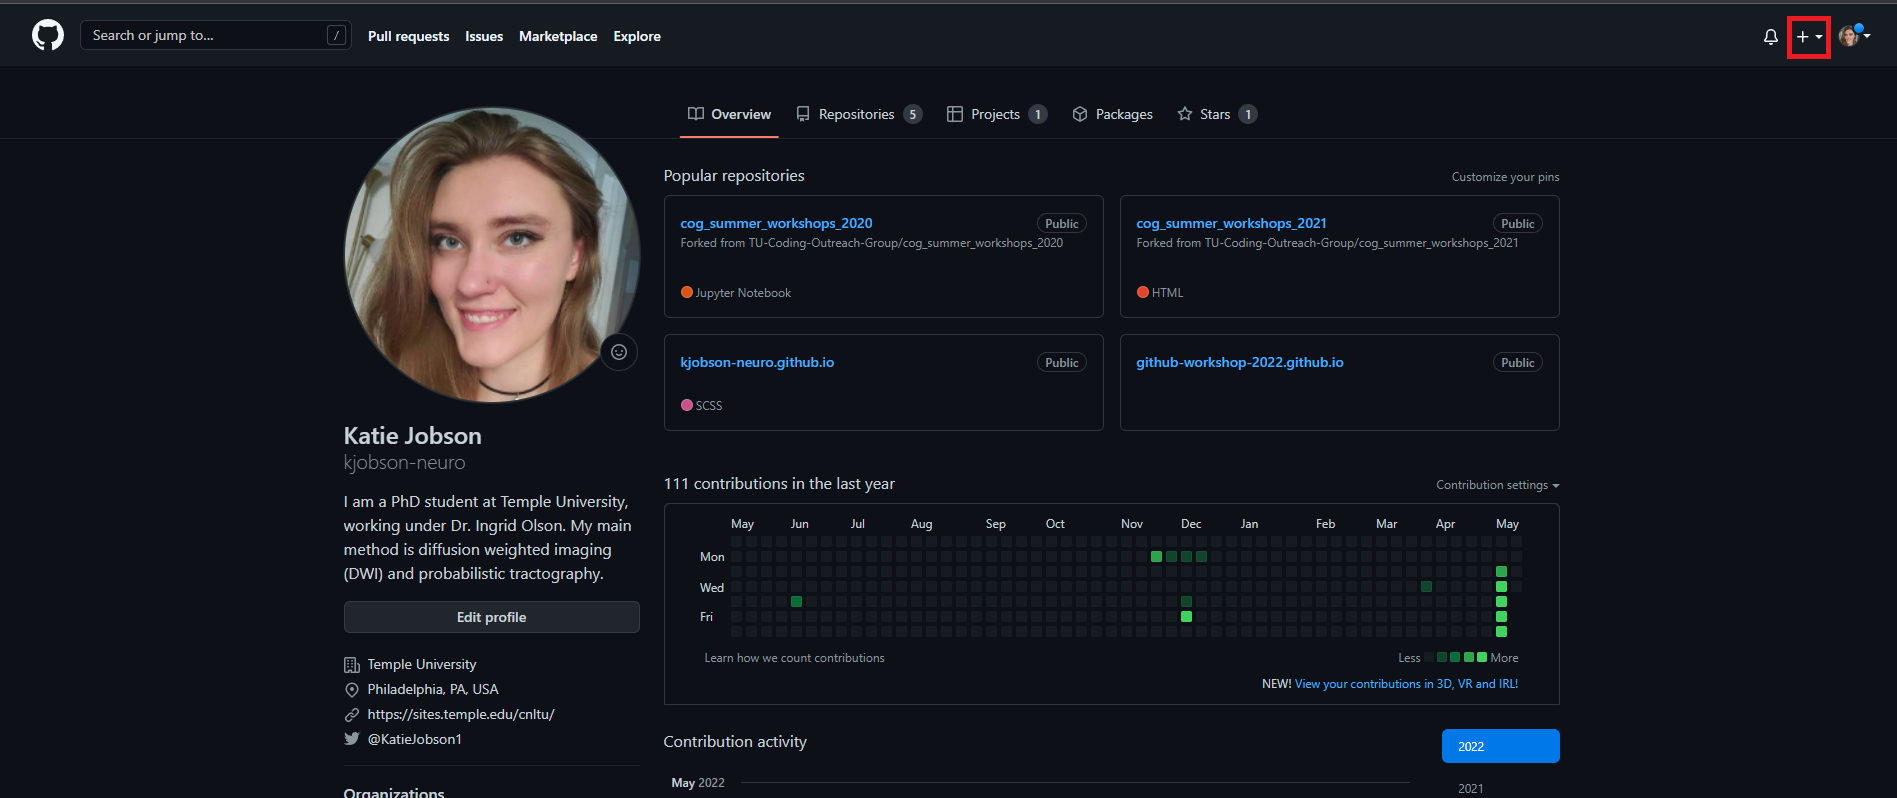
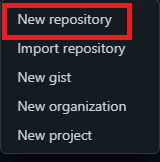
This will open a dropdown where you can click 'New repository':
Now you should be in a window where you are being asked to name your repository. Like mentioned before, GitHub Pages requires your website to include your GitHub username with '.github.io' attached at the end. So my GitHub Pages repository is called kjobson-neuro.github.io.
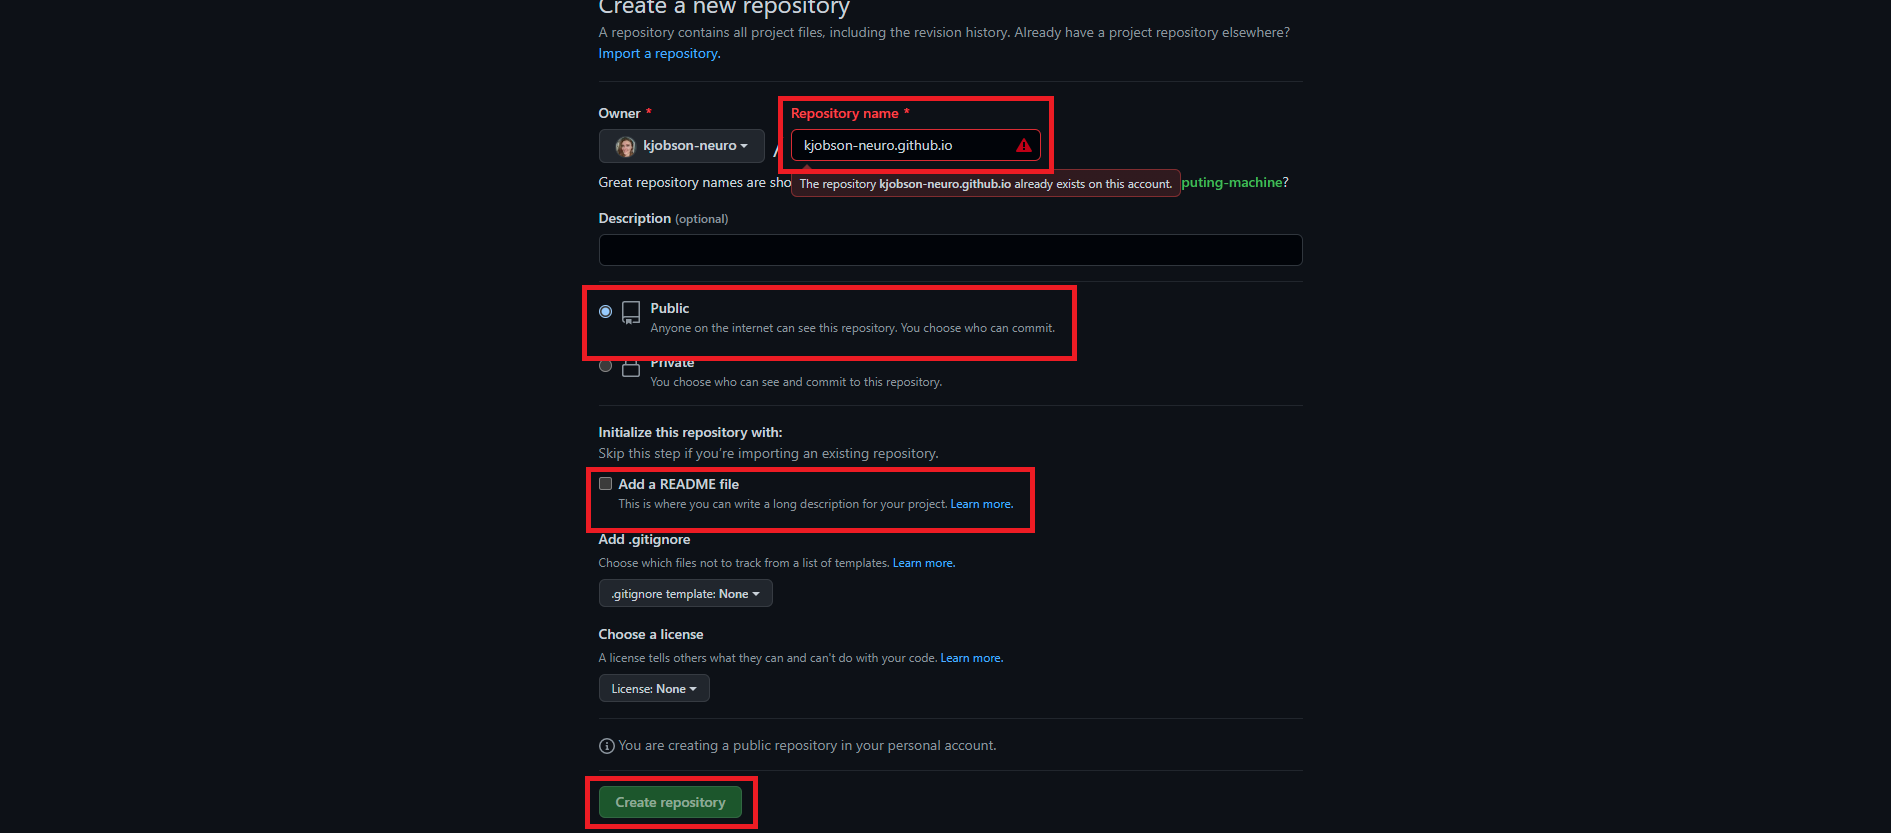
Please note that I am getting a warning because I have already created this page. If you are getting a warning, double check the spelling of your username.
You need to leave this page as public to be able to edit it as a GitHub Page.
You should also check the box next to 'Add a README file'. This just allows you to have a place to start from, and GitHub pages automatically populates that file with how to use Markdown in GitHub, which could be handy if you don't have much experience with Markdown.
Now you can click 'Create Repository' at the bottom!
One last thing to intialize your GitHub Page before we move on to adding a theme. You have to select a branch to run it from and save. From your new repo, you can click settings. Then, on the left-hand side of the page, there will be a tab called Pages. Click on that, and you will get a page that will allow you to edit certain things on your webiste, such as the default branch and the theme.
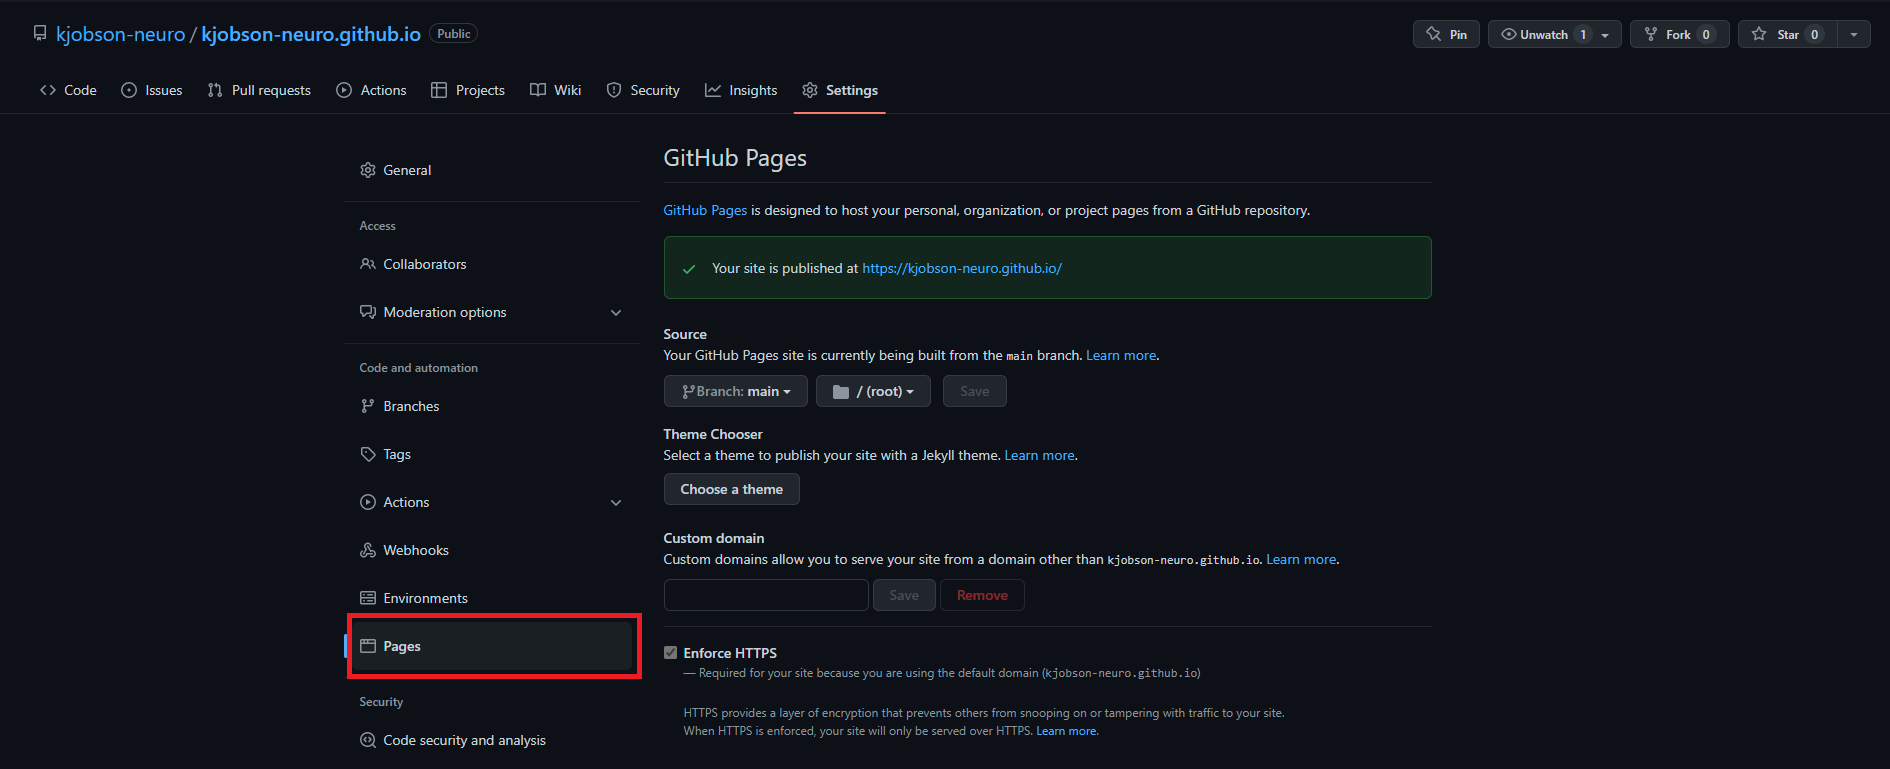
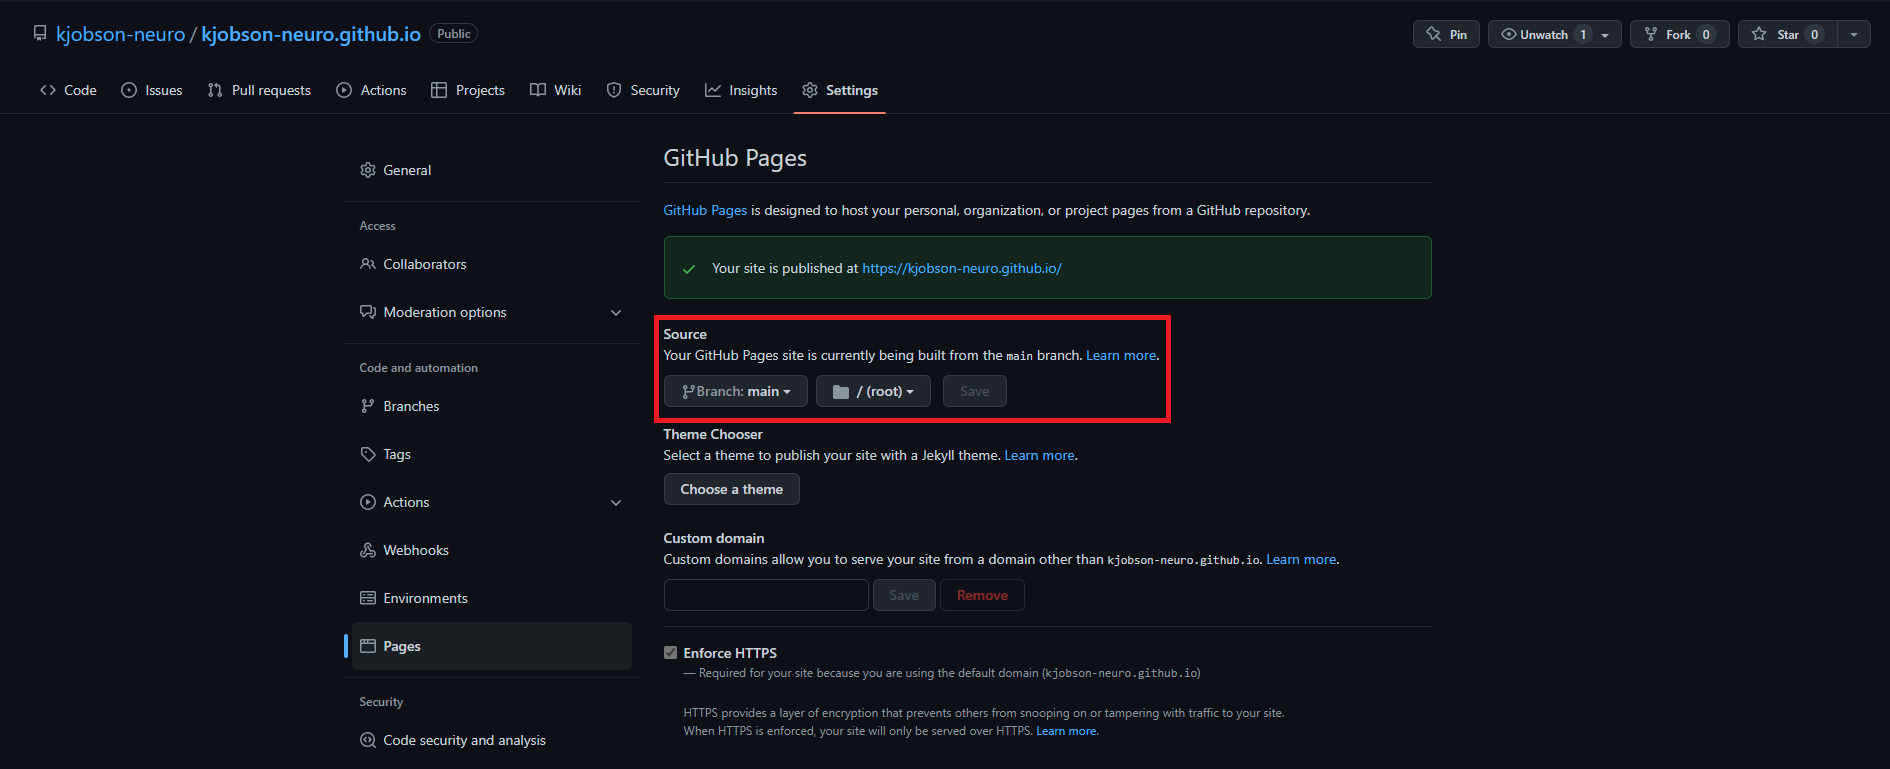
Once you have gotten to this tab, you should look under 'Source'. It should ask you where you want your website hosted from - I would recommend doing what I have set, which is to host it from the 'main' branch (the default of GitHub) and /root. Once you have set those, you can click the 'Save' button to initalize your page!
Something to note about GitHub - I find it difficult to edit and add things via the online website. I think the best way to think about it and use it is from the command line. You can easily manuever through it like a folder on your own dsesktop. So you will need some knowledge of the command line for the rest of this tutorial.
Easy Themes through GitHub
So, now you have your page. How do we add a theme to it?
The easiest way to do this is to choose one of the pre-made templates from GitHub. From your new repo, you can click settings. Then, on the left-hand side of the page, there will be a tab called Pages. Click on that, and you will get a page that will allow you to edit certain things on your webiste, such as the default branch and the theme. Just to play around a litte, click 'Choose a theme'.
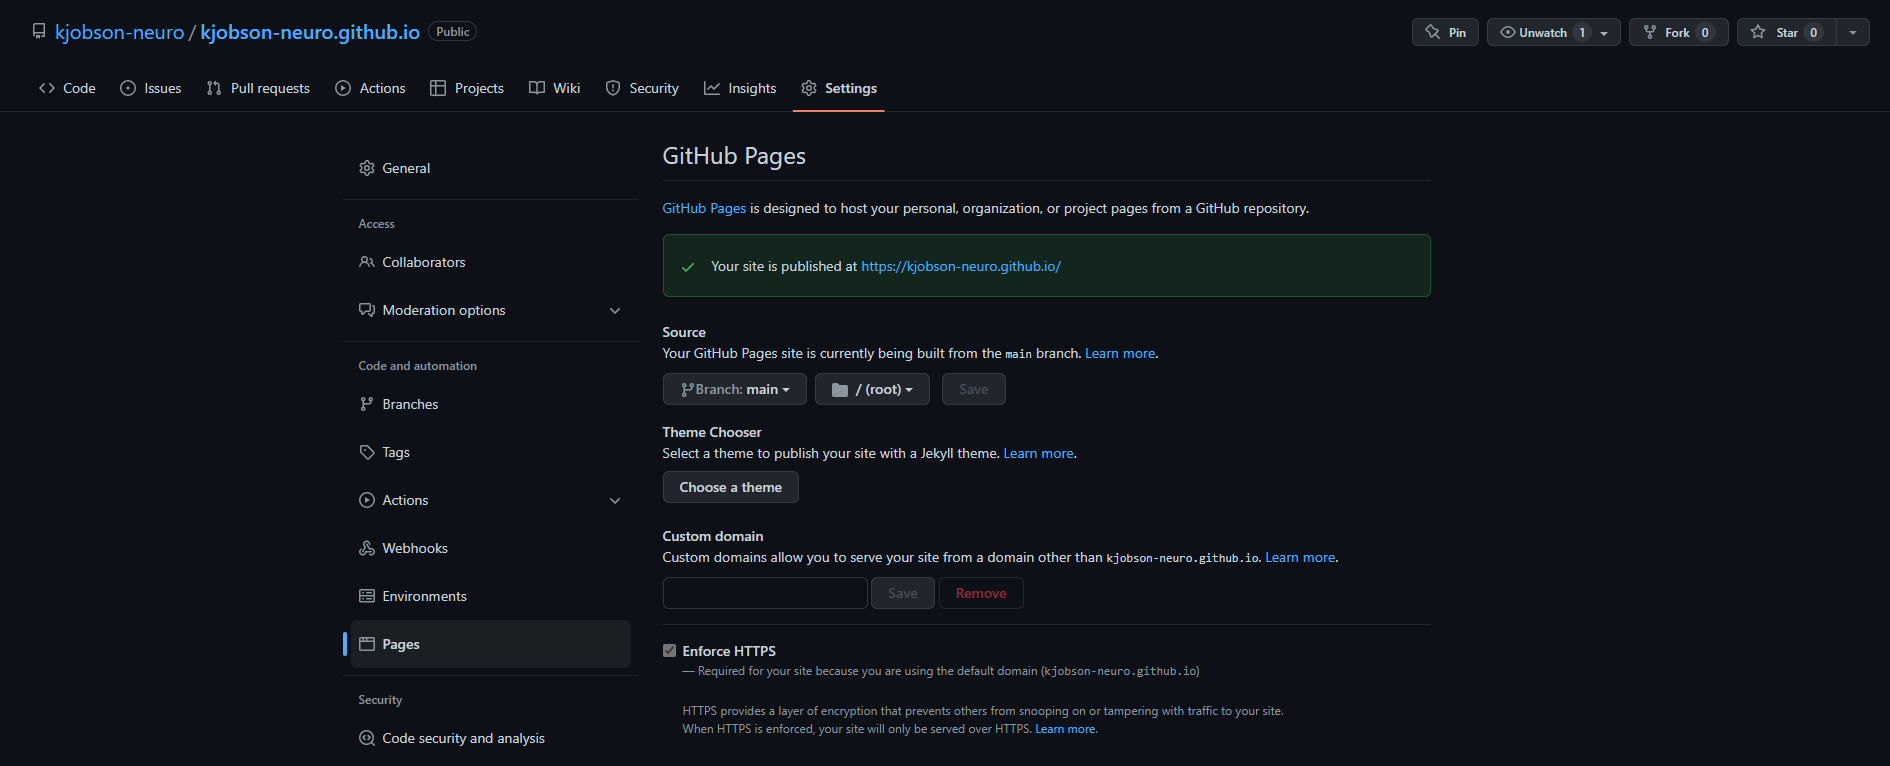
These different themes are customizable to your liking. Most involve needing to go to the original GitHub repo of the theme and finding what you can customize. For instance if you go to the Minimal theme on GitHub, you will see in the repo that there is a 'stylesheet' folder. In that folder, you can find everything you can change, from font size, to adding images to your page, to background colors. Some themes are more difficult to work with than others.
While some of these basic themes might be more your style, we are going to be working with a custom theme. It's called Just the Docs. I think the thinks we do with this theme should generalize fairly well to any other theme you might choose.
Copy our Website Template
First things first. You need to download your GithUb Pages repo on to your local computer so you can make edits. You can edit things on your web browser, but I really do not recommend this. So, clone your repo somewhere easy to find using the command below. It may be easier to go to your Pages repo and copy the web address,
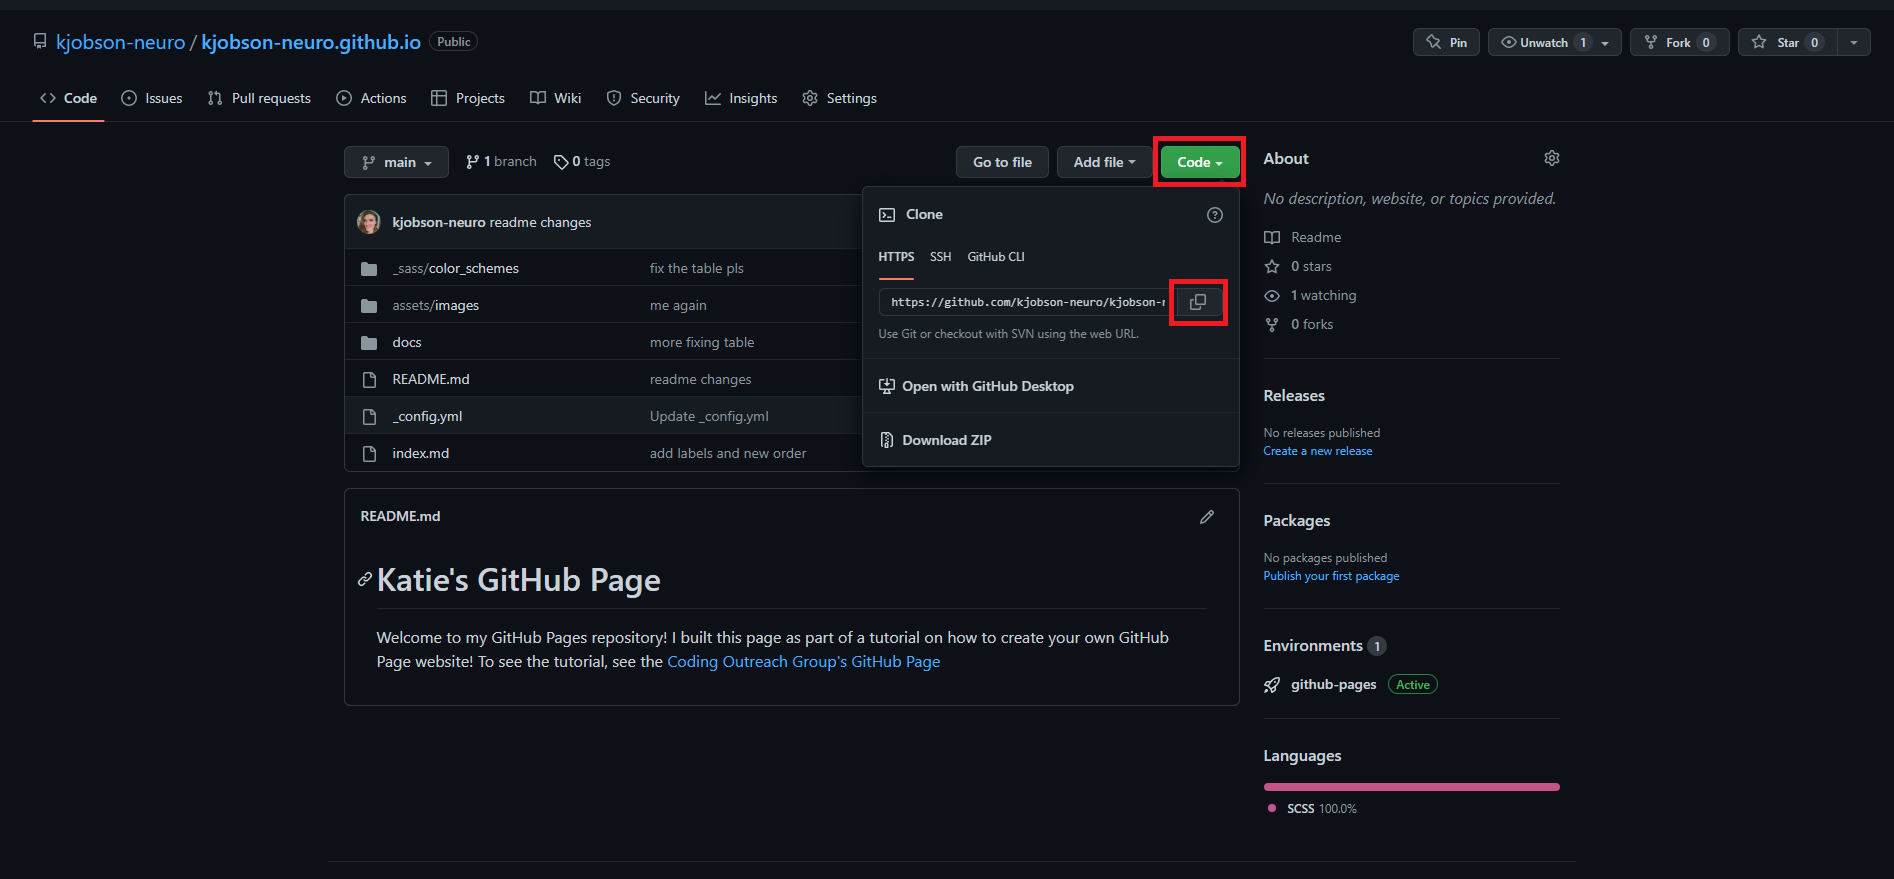
but this is what the command should look like:
git clone https://github.com/[your GitHub username]/[name of your Pages repo].io.git
MAKE SURE YOU PAY ATTENTION TO WHERE YOU DOWNLOAD YOUR REPOS - they download as their own folders on your desktop, and you should keep different repos separate.
I have provided a template for your website on the COG Workshop Github repo, under the github folder. Navigate your way inside of the COG repo (which you should have downloaded from earlier in the workshop), and navigate into the github folder:
cd /your/path/to/cog_summer_workshops_2022

cd github
Inside, you should see some of the materials for this workshop, but you should also see a folder called 'template'. Inside of this folder is all that you will need to get started building your website. There is a particular directory structure that was implied by the creators of the theme, so I stuck with it. Copy all of the files inside of this folder into the folder of your repo that you just downloaded.
cp template/* /your/path/to/[name of your Pages repo].io/
%%HTML
<iframe width="560" height="315" src="https://www.youtube.com/embed/n6wLnSEchFQ" title="YouTube video player" frameborder="0" allowfullscreen></iframe>
Now that you have yourself a starter template for the webiste, let's talk about how you can edit it and where to find resources.
We are using the Just the Docs theme. I added the line necessary to initlaize the theme for you already.
Like I mentioned in the video, you are mainly going to be editing two files (_config.yml, cog_website.scss and README.md). The README.md file will be your front page as I mentioned, so that is just your basic introductory stuff, or really whatever you would like your front page to look like. This is done with Markdown as the language, and you can just make edits directly to your README.md file.
Every variable you could ever want to add to your config file will be found here. All of these will be enacted as the default of your website - if you want to add something different, you will have to call the command listed here and change it in the way that you would like. For instance, you can choose whether links on your website will open a new tab or not, using this line of code:
aux_links_new_tab:
As you can see on the template GitHub, the default is false!
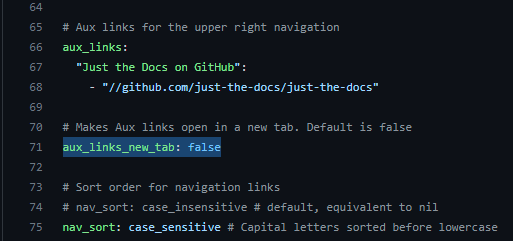
But, if you're like me, you want your website to open a new tab and not send the user to a new one.
Navigate into your Pages repository and edit the _config.yml file to add:
aux_links_new_tab: true
As far as I am aware, order does not matter, so you can put this at the end of the document. You will notice that there are some lines of code commended out in this file already; ignore them for now, we will get back to this!
Now, let's send that change to your GitHub! I want to do this as the process will be slightly different than sending a change to the COG GitHub as you have full permissions on it.
Remmeber, check to see what changes need to be added:
git status
Then add them, commit them, and send them off!
git add _config.yml
git commit -a -m "change aux link default"
git push origin main
You'll notice that this is slightly different process. Like I mentioned before, you have full access to your own repo, so you don't need to request permission or set up separate branches. In the last command, you only have to push to 'main' as this is the only branch that should exist on your repo right now.
There is one other file that you will need to edit, /_sass/color_schemes/cog_website.scss
Inside, you will find different aspects of the webpage you can change the color scheme of. These are all preset, much like the config file, if you want to change it you have to override it and add your own scheme. The base website looks like this page. You can find all possible ways to change the look of the webpage here, which includes the margins, font sizes and styles, etc.
You can go here and here for a list of colors and their accompanying code that you will insert into the cog_website.scss file. For an example of how to format the color codes, see the second line of the .scss file I have provided for you - the rest are empty to populate as you wish!
Adding Pages to Pages
There are lots of ways to customize your page that are a bit easier to understand by just looking at the documentation, but I wanted to give a short explanation of how to add pages on to your website.
Like I mentioned in the video earlier, you will be using a Markdown file to create the page, so you will have to have a little bit of knowledge about how Markdown works as a language. So, the first thing you want to do is create a Markdown file with the name you would like your new page to be called:
touch docs/Publications.md
Now you have to tell GitHub that you want this to be a page featured on the left-hand side of your website. If you aim to have multiple pages, you also need to indicate the order. Edit your Markdown file to include this information at the top:
---
layout: default
title: Publications
nav_order: 1
---
Now, if you would like to have your different pages have different layouts, you can do that! You would just have to create another .scss file under sass/color_scheme/ and indicate the name of the file instead of 'deafult'.
Importantly, if you would like to have a dropdown bar with sub-pages, you do have to change some things. You have to indicate which file is the "parent" file, and which is the "child" file. You also have to indicate that the parent file "has children". For example, if I wanted my 'About Me' page (aka README.md) to be the parent to the 'Publications' page, I would add this to the README.md:
---
layout: default
title: About Me
nav_order: 1
has_children: true
---
And I would change the Publications.md file to read:
---
layout: default
title: Publications
nav_order: 1
parent: About Me
---
This just lets GitHub Pages know what pages go where, and in what order!
Time to Customize
Now, we are going to give you all some free time to begin the customization of your pages. Edit your README.md file to add to the front page of your website using Markdown. Change the style and color scheme of your page, and make decisions on how it will behave. Make sure you push your changes to your GitHub as you go to update your website.
While you are looking for ways to customize, the example site of Just the Docs has all of the cool ways you can change your site, including adding pages, buttons, links, and more!
Once you have edited your cog_website.scss file as you wish, you will have to tell the website that you want to use this document to display your theme. When you are finished, make sure you edit the config file and remove the '#' before the variable 'theme'.
Load Your Website
Once you have customized your website a little, volunteer to present it to the group!
%%HTML
<iframe width="560" height="315" src="https://www.youtube.com/embed/i6EFExiJD2M" title="YouTube video player" frameborder="0" allowfullscreen></iframe>